In today’s digital age, creating realistic 3D models has become an essential skill for designers, architects, and hobbyists alike. One popular project that many enthusiasts undertake is the creation of indoor playground 3D models. These models can be used for various purposes such as architectural visualizations, virtual reality environments, or even video game design. This guide will delve into the steps and tips required to create an impressive indoor playground 3D model.
Understanding the Basics
Before diving into the creation process, it’s important to understand what a 3D model entails. A 3D model is a mathematical representation of any three-dimensional object through specialized software. It allows users to visualize their designs from all angles, making it easier to identify and correct any potential issues before construction or rendering.
Selecting the Right Software
Choosing the right software is crucial for the success of your 3D modeling project. Popular options include Autodesk Maya, Blender, and SketchUp. Each software has its own set of features, learning curve, and community support. For beginners, SketchUp is often recommended due to its user-friendly interface and extensive online resources.
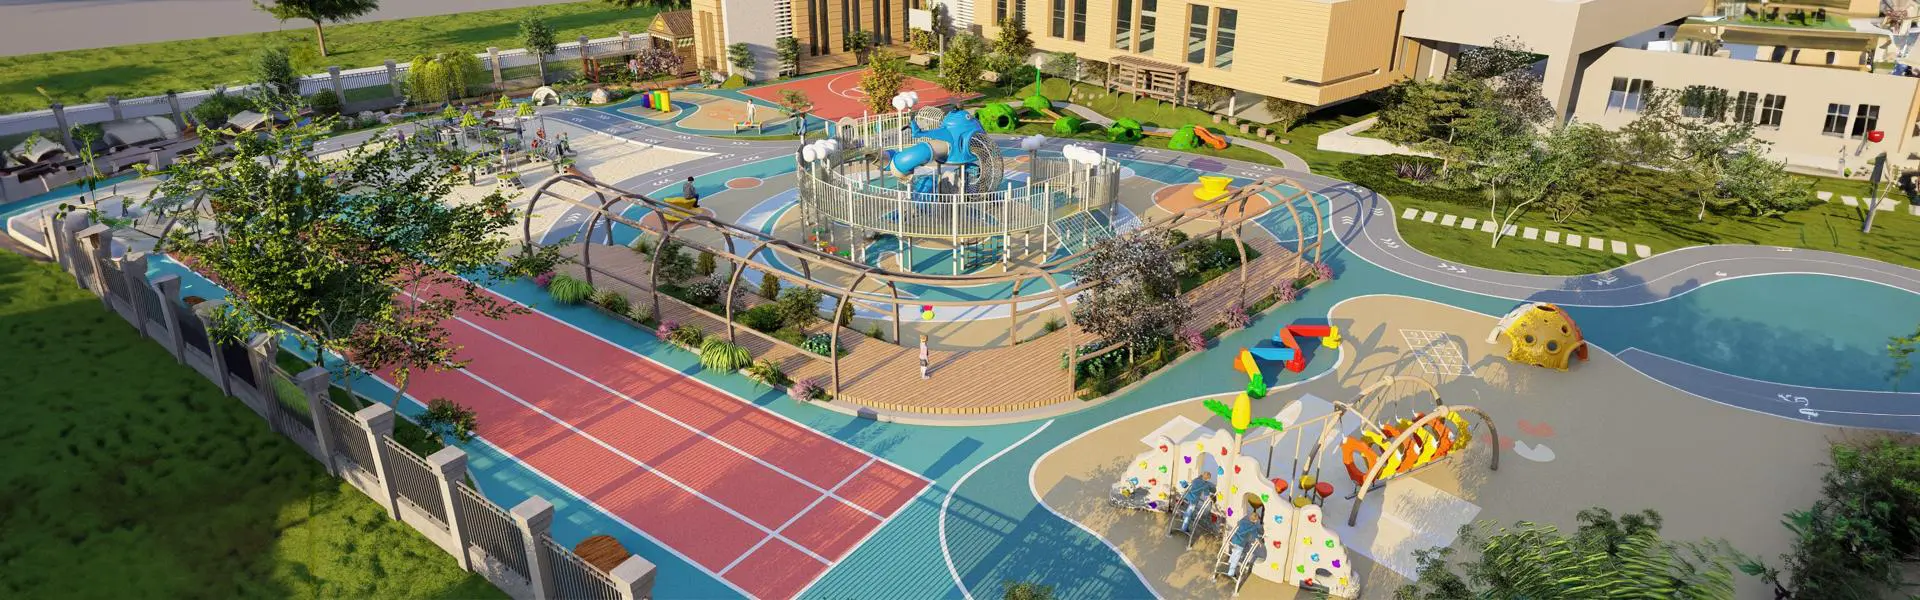
Planning Your Playground Design
Planning is key in creating any successful project. Start by sketching out your ideas on paper or using digital drawing tools. Think about the different elements you want to include such as slides, climbing structures, ball pits, and interactive zones. Consider the target age group, safety regulations, and space limitations.
Creating the Base Model
Once your design plan is finalized, start by creating the base model of your playground. This involves constructing the basic shapes and layouts that will form the foundation of your structure. Most 3D modeling software comes with pre-built shapes like cubes, cylinders, and spheres which can be easily manipulated and combined to create more complex forms.
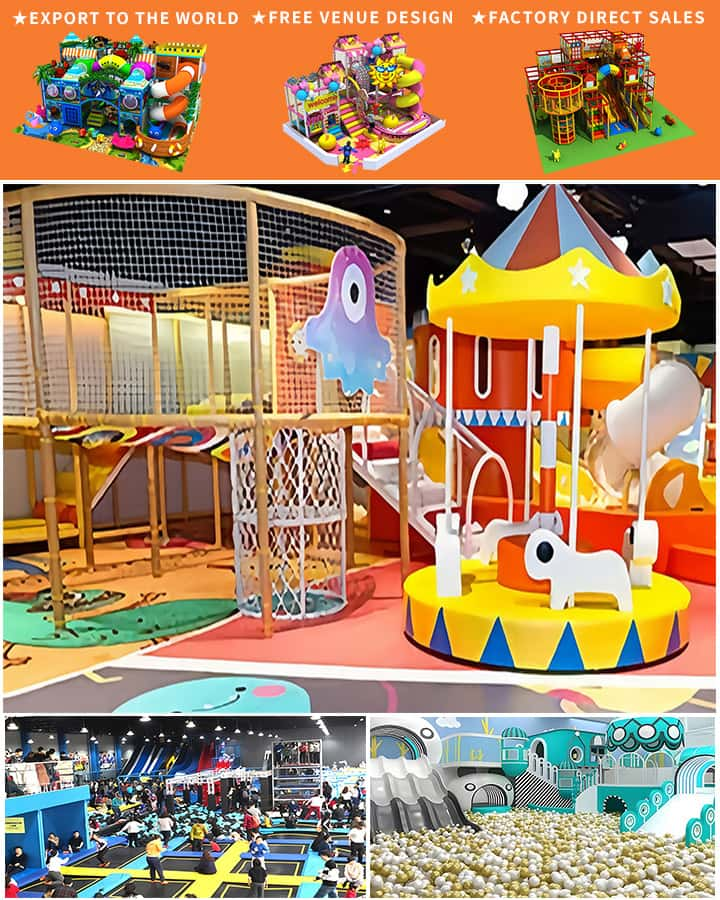
Adding Details and Textures
With the base model in place, it’s time to add details and textures to bring your playground to life. This step involves adding smaller elements such as railings, steps, and decorations. Texturing involves applying materials and colors to your model to make it appear more realistic. Many software packages come with an extensive library of textures, or you can create your own.
Lighting and Rendering
Lighting plays a crucial role in enhancing the realism of your 3D model. Experiment with different light sources and settings to achieve the desired ambiance. Once satisfied with the lighting, render your model. Rendering is the process of generating a high-quality image or animation from your 3D scene, taking into account all lighting, shadows, and textures.
Final Touches and Presentation
After rendering, review your model carefully and make any necessary adjustments. Add any final touches such as people or other environmental elements to provide context. Present your completed indoor playground 3D model in a portfolio or share it with others for feedback and further improvement.
Conclusion
Creating an indoor playground 3D model is a rewarding endeavor that combines creativity, technical skills, and attention to detail. By following these steps and utilizing the right tools, anyone can bring their imaginative play spaces to life in stunning detail. Whether for professional projects or personal satisfaction, mastering the art of 3D modeling opens up endless possibilities in design and visualization.